Η συνταγή και στα ελληνικά στο τέλος της ανάρτησης!
Hello my friends! I am back to Athens after my pilgrimage to my father’s village. We had a great time and I found the chance to get some rest and some sleep which I desperately needed. I hope you are all well and had a great weekend.
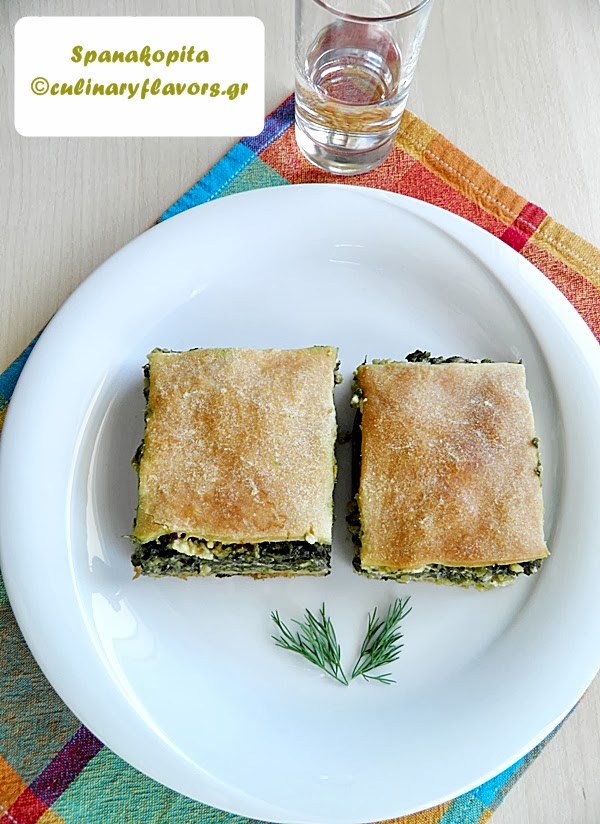
I think it is high time we talked about spanakopita in this post. I am sure all of you know and/or have tasted at least once this famous, traditional, Greek pie. Many variations exist and you can find many recipes in the net close, less close or completely different from the original version. In this post I will give you an original recipe many Greeks, including myself, follow to make the pie. But before I do that, I would like first to talk to you a little bit about this pie and all the Greek pies in general.
Greece is a mountainous country with a few plains scattered here and there. There are specific areas in the mainland, where no plain exists and people live in the slopes or feet of rocky mountains. In the old days, these people were quite secluded from the big urban areas and in some cases they stayed that way for the whole winter. As you can understand the range of food they consumed was limited to what they were cultivating or breathing or to everything they could get from Mother Nature. Flour is a material that is kept for a long time and nature has so many wonderful herbs and greens to offer. Thus, those people started making handmade phylo and filling it with whatever they could find around them. Greek country is full of greens and herbs that have a very unique and delicious taste. As spinach is a very easy green to cultivate and does not require any special care, it was also included to their pie filling. My father said to me that after World War 2 when good food was a luxury for them, his mother left early in the morning to go and pick up some greens to make a pie to feed her children. These pies and the milk from the domestic goat kept them alive those very difficult years.
But let’s go back to Spanakopita. To begin with, I will first have to clarify that the recipe below along with all the recipes that include cheese are called Spanakotiropita which means Spanakopita with cheese. Nevertheless, for the sake of simplicity, even here in Greece, when we say spanakopita, most of the times, we mean the one with the cheese as well. Only in Lent periods we clarify which one we want, because during those periods cheese is not allowed and thus all the people who fasten eat the Spanakopita and not the other one with the cheese. So, this is the story as far as the name is concerned.
Now, spanakopita (which is spanakotiropita actually) is a staple in the Greek kitchen and is a pie that most of the Greek households make at least once every month. Usually, these days spanakopita is made with store bought phylo, as most women work and do not have the time to make it from scratch. Even I, most of the times, use phylo from the supermarket. You cannot blame a working woman for trying to make her life just a little less complicated, can you?
Well, this time I decided to shake a bit things up. I thought that in order to present this pie correctly and exactly as it is supposed to be, I should make my own phylo. And so I did. The recipe for the phylo dough comes from Dina Nikolaou a Greek chef working in Greece and Paris. The filling is how my grandmother, mother and consequently I, do it at our home.
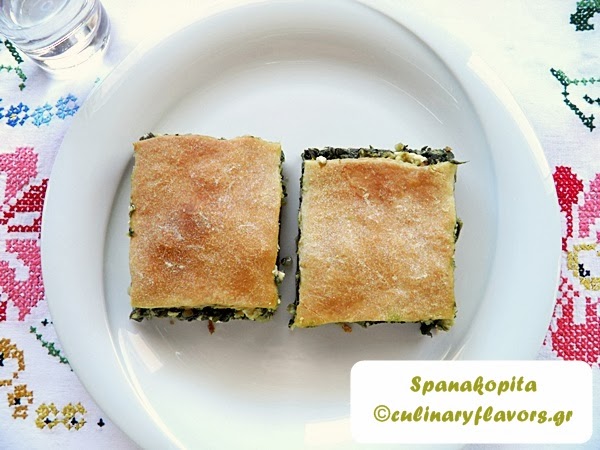
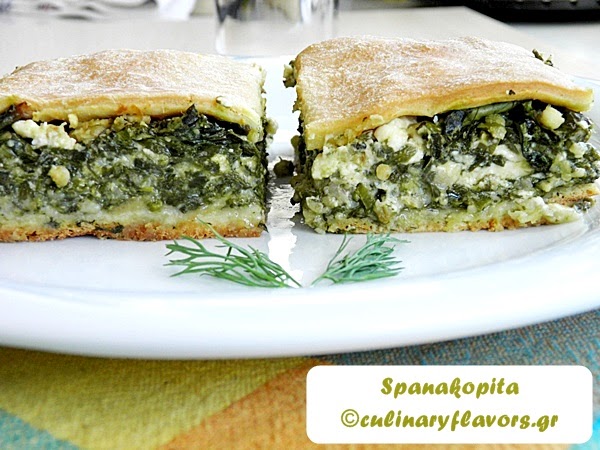
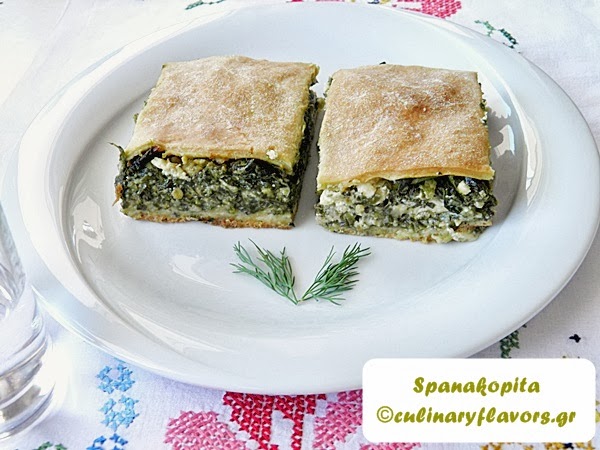
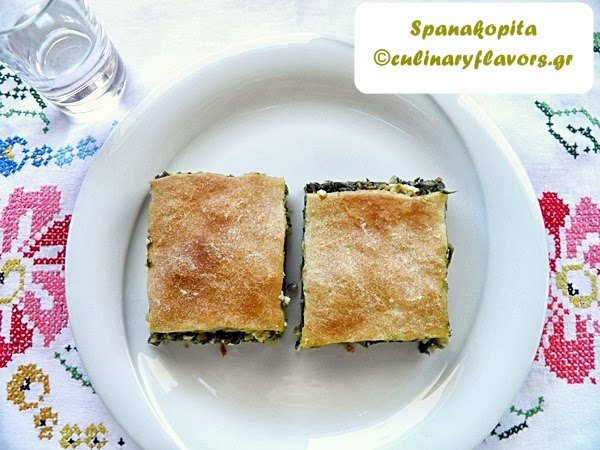
This is a beautiful pie, with spinach and feta cheese to be the dominant ingredients. I know many of you hesitate to open your own phylo. I was the same, I always felt intimidated by dough. But if you have the time, do try this recipe. It is very easy and I am sure it will work for you just like it worked for me. I would like also to give a little tip to all of you who want to open your own phylo. In the bench on which you will open the phylo, spread some semolina or fine flour from corn, not wheat flour. You cannot believe how much easier the phylo opens in this way. Naturally, just like in any other case handmade has absolutely no comparison to store bought one.
Spanakopita with Handmade Phylo
Ingredients
For the Phylo Dough
500 gr. / 17.5 oz. all-purpose flour
3 tbsp olive oil
1 egg
3 tbsp milk
1 envelope dry yeast, about 9 gr. / 2tsp
2 tbsp white vinegar
Salt and pepper (I used 1 tsp salt and no pepper)
100 ml/3 fl. Oz. of warm water plus 50 gr. /3 tbsp
Olive oil to brush the phyllo
For the Filling
700 gr. / 21 oz. spinach
5 scallions, chopped
2 onions, chopped
400 gr. /14 oz. feta, crumbled
1 egg
A bunch of dill, finely chopped
1 tbsp salt
1 handful of cracked wheat
Olive oil for sautéing the onions
Instructions
First we make the phylo dough
For the Phylo Dough
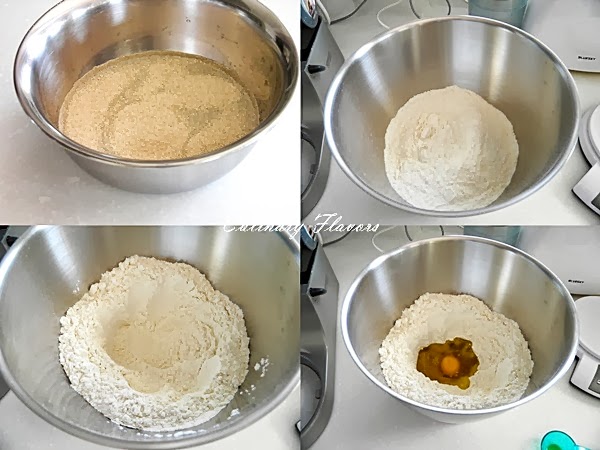
In a non-reactive bowl pour the warm water and the yeast and let it for 5 minutes to dissolve and foam.
In the mixer bowl put the flour after you have shifted it.
Make a hole and put the olive oil and the egg in it.
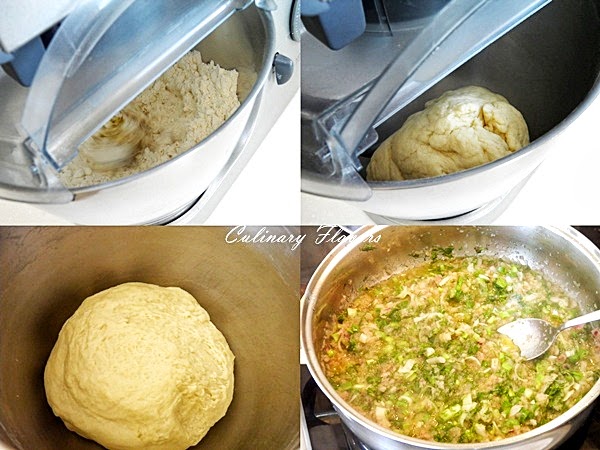
With the hook begin to slowly, slowly mix these ingredients.
Pour the milk, the vinegar and add salt and pepper.
Continue to mix.
Add the yeast and continue to mix.
If you see that the dough is not coming together, add from the 3 tbsp of water, spoon by spoon until a soft dough is formed around the hook.
It may not need all 3 tbsp.
Let the mixer work it for about 10 minutes and then test the dough by pressing gently your finger against it.
If the hole by your finger disappears in 2 to 3 seconds then the dough is ready, if not then just mix it a little bit more.
Let the dough relax for an hour.
In the meantime, let’s make the filling.
For the Filling
Wash the spinach and drain it.
In a skillet pour 3 tbsp of olive oil in medium heat.
Add the onions, scallions and dill and sauté them until they become soft.
Remove from fire, add the cracked wheat and the egg and mix well.
In a bowl throw the raw spinach after you have squeezed the excessive water and cut it roughly with your fingers.
In this pie we do not sauté the spinach; we add it raw in the pie.
Add the onion mixture, the feta cheese and the salt, mix and set aside.
Let’s make the phylo now.
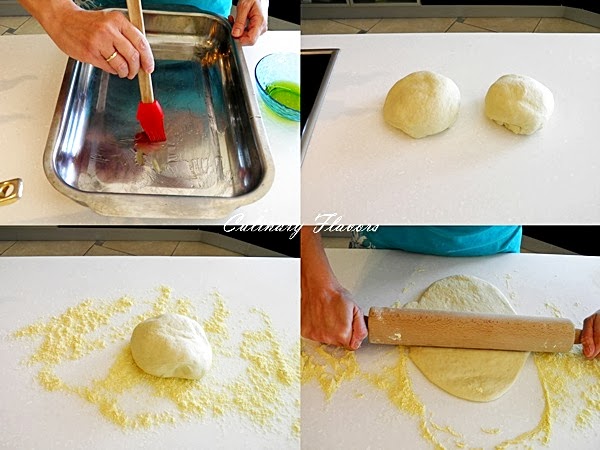
In the bench in which you will work with the dough, throw a little bit of fine flour from corn or semolina. These two ingredients make it easier to open the phylo.
Divide the dough in two balls one a little bit larger than the other.
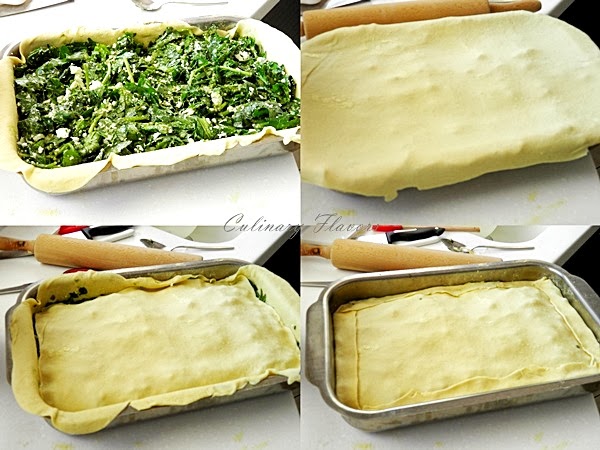
Take the rolling pin and start working with the larger one, which will be placed on the bottom of the pan.
If you will use a rectangular pan work by moving the rolling pin back and forth. If you use a round pan move it towards all directions.
Take a rectangular pan about 25X35 cm / 10X14 in. or a round one about 32 cm / 12 in. and oil it with olive oil.
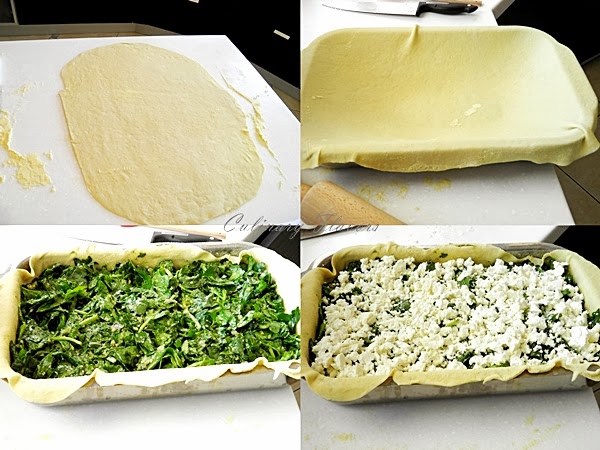
Place the phylo sheet on the pan.
It should be larger than the pan and its sides must fall outside the pan.
Pour the filling in.
Then work with the other ball of dough.
Open it to phylo and place it on top of the filling.
Cut the edges of the dough so as to just cover the filling from side to side.
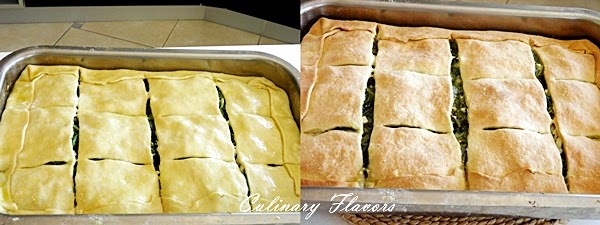
Turn the sides of the bottomed phylo, which extend beyond the pan, in such a way as to cover the upper phyllo around its edges.
Brush the surface of the phyllo with olive oil.
Cut it in squared pieces.
Finally just spray some water on the top.
Bake in a preheated oven at 175° C/ 350° F on the lowest part of your oven for 50 to 60 minutes or until the two phylos become golden.
- 500 gr. / 17.5 oz. all-purpose flour
- 3 tbsp olive oil
- 1 egg
- 3 tbsp milk
- 1 envelope dry yeast, about 9 gr. / 2tsp
- 2 tbsp white vinegar
- Salt and pepper (I used 1 tsp salt and no pepper)
- 100 ml/3 fl. Oz. of warm water plus 50 gr. /3 tbsp
- Olive oil to brush the phylo
- 700 gr. / 21 oz. spinach
- 5 scallions, chopped
- 2 onions, chopped
- 400 gr. /14 oz. feta, crumbled
- 1 egg
- A bunch of dill, finely chopped
- 1 tbsp salt
- 1 handful of cracked wheat
- Olive oil for sautéing the onions
- First we make the phylo dough
- In a non-reactive bowl pour the warm water and the yeast and let it for 5 minutes to dissolve and foam.
- In the mixer bowl put the flour after you have shifted it.
- Make a hole and put the olive oil and the egg in it.
- With the hook begin to slowly, slowly mix these ingredients.
- Pour the milk, the vinegar and add salt and pepper.
- Continue to mix.
- Add the yeast and continue to mix.
- If you see that the dough is not coming together, add from the 3 tbsp of water, spoon by spoon until a soft dough is formed around the hook.
- It may not need all 3 tbsp.
- Let the mixer work it for about 10 minutes and then test the dough by pressing gently your finger against it.
- If the hole by your finger disappears in 2 to 3 seconds then the dough is ready, if not then just mix it a little bit more.
- Let the dough relax for an hour.
- In the meantime, let’s make the filling.
- Wash the spinach and drain it.
- In a skillet pour 3 tbsp of olive oil in medium heat.
- Add the onions, scallions and dill and sauté them until they become soft.
- Remove from fire, add the cracked wheat and the egg and mix well.
- In a bowl throw the raw spinach after you have squeezed the excessive water and cut it roughly with your fingers.
- In this pie we do not sauté the spinach; we add it raw in the pie.
- Add the onion mixture, the feta cheese and the salt, mix and set aside.
- Let’s make the phylo now.
- In the bench in which you will work with the dough, throw a little bit of fine flour from corn or semolina. These two ingredients make it easier to open the phylo.
- Divide the dough in two balls one a little bit larger than the other.
- Take the rolling pin and start working with the larger one, which will be placed on the bottom of the pan.
- If you will use a rectangular pan work by moving the rolling pin back and forth. If you use a round pan move it towards all directions.
- Take a rectangular pan about 25X35 cm / 10X14 in. or a round one about 32 cm / 12 in. and oil it with olive oil.
- Place the phyllo sheet on the pan.
- It should be larger than the pan and its sides must fall outside the pan.
- Pour the filling in.
- Then work with the other ball of dough.
- Open it to phyllo and place it on top of the filling.
- Cut the edges of the dough so as to just cover the filling from side to side.
- Turn the sides of the bottomed phyllo, which extend beyond the pan, in such a way as to cover the upper phyllo around its edges.
- Brush the surface of the phyllo with olive oil.
- Cut it in squared pieces.
- Finally just spray some water on the top.
- Bake in a preheated oven at 175° C/ 350° F on the lowest part of your oven for 50 to 60 minutes or until the two phylos become golden.
- 500 γρ. αλεύρι για όλες τις χρήσεις
- 3 κ.σ. ελαιόλαδο
- 1 αυγό
- 3 κ.σ. γάλα
- 1 φακελάκι μαγιά ξηρή
- 2 κ.σ. άσπρο ξύδι
- Αλάτι και πιπέρι (χρησιμοποίησα 1 κουταλάκι του γλυκού αλάτι)
- 100 ml χλιαρό νερό συν 3 κ.σ.
- Ελαιόλαδο για το άλειμμα του φύλλου
- 700 γρ. σπανάκι
- 5 κρεμμυδάκια, ψιλοκομμένα
- 2 κρεμμύδια, ψιλοκομμένα
- 400 γρ. φέτα, θρυμματισμένη
- 1 αυγό
- Ένα μάτσο άνηθο ψιλοκοµµένο
- 1 κ.σ. αλάτι
- 1 χούφτα πλιγούρι
- Ελαιόλαδο για να σωτάρετε τα κρεμμύδια
- Πρώτα κάνουμε το φύλλο
- Σε ένα μεταλλικό μπολ ρίξτε το χλιαρό νερό και τη μαγιά και αφήστε για 5 λεπτά για να διαλυθεί και να αφρίσει.
- Στο μπολ του μίξερ βάλτε το αλεύρι, αφού το κοσκινίσετε.
- Κάντε μια τρύπα και ρίξτε το ελαιόλαδο και το αυγό σε αυτό.
- Με το γάντζο αρχίστε σιγά-σιγά, να αναμιγνύετε τα συστατικά.
- Ρίξτε το γάλα, το ξίδι και προσθέστε αλάτι και πιπέρι.
- Συνεχίστε να αναμειγνύετε.
- Ρίξτε μέσα τη μαγιά και συνεχίστε το χτύπημα.
- Αν δείτε ότι η ζύμη δεν μαζεύεται σαν μπάλα γύρω από το γάντζο, προσθέστε από τις 3 κουταλιές της σούπας νερό, κουτάλι κουτάλι μέχρι να σχηματιστεί μια μαλακή ζύμη γύρω από το γάντζο.
- Ίσως δεν χρειάζεται και τις 3 κουταλιές της σούπας.
- Αφήστε το μίξερ να δουλέψει για περίπου 10 λεπτά και στη συνέχεια, δοκιμάστε τη ζύμη, πιέζοντας απαλά το δάχτυλό σας πάνω της.
- Αν το βαθούλωμα από το δάχτυλό σας εξαφανίζεται σε 2 έως 3 δευτερόλεπτα, η ζύμη είναι έτοιμη, αν όχι τότε απλά ανακατέψτε λίγο περισσότερο.
- Αφήστε τη ζύμη να ξεκουραστεί για μια ώρα.
- Εν τω μεταξύ, κάνετε τη γέμιση.
- Πλύντε το σπανάκι και σουρώστε το.
- Σε μια κατσαρόλα, ρίξτε 3 κουταλιές της σούπας ελαιόλαδο σε μέτρια φωτιά.
- Προσθέστε τα κρεμμύδια, κρεμμυδάκια και άνηθο και σωτάρετε τα μέχρι να μαλακώσουν.
- Αφαιρέστε από τη φωτιά, προσθέστε το πλιγούρι και το αυγό και ανακατέψτε καλά.
- Σε ένα μπολ ρίξτε το ωμό σπανάκι, αφού το έχετε στύψει καλά ώστε να φύγουν όλα τα υγρά του και κόψτε το με τα χέρια σας.
- Σε αυτήν την πίτα δεν σωτάρουμε το σπανάκι το προσθέσουμε ωμό.
- Προσθέστε τα κρεμμύδια, τη φέτα και το αλάτι και ανακατέψτε.
- Βάλτε το στην άκρη
- Ας κάνουμε τώρα το φύλλο.
- Στο πάγκο πάνω στον οποίο θα δουλέψετε τη ζύμη, ρίξτε λίγο λεπτό αλεύρι από καλαμπόκι ή σιμιγδάλι.
- Με αυτά τα δύο συστατικά είναι πιο εύκολο να ανοίξει το φύλλο.
- Χωρίστε τη ζύμη σε δύο μπάλες τη μία λίγο μεγαλύτερη από την άλλη.
- Πάρτε το πλάστη και αρχίστε να ανοίγετε φύλλο ξεκινώντας από τη μεγαλύτερη μπάλα που θα πάει από κάτω.
- Πάρτε ένα ορθογώνιο ταψί για 25 X 35 cm ή ένα στρογγυλό περίπου 32 cm και λαδώστε το.
- Τοποθετήστε το φύλλο στο ταψί.
- Το φύλλο θα πρέπει να είναι μεγαλύτερο από το ταψί και οι πλευρές του να πέφτουν έξω από το ταψί.
- Ρίξτε τη γέμιση.
- Στη συνέχεια ανοίξτε το δεύτερο φύλλο.
- Βάλτε το πάνω από τη γέμιση.
- Κόψτε τις άκρες της ζύμης ώστε να καλύπτουν μόνο τη γέμιση από πλευρά σε πλευρά.
- Γυρίστε τις πλευρές του κάτω φύλλου που εξέχουν έτσι ώστε να καλύψουν το πάνω φύλλο στις άκρες γύρω-γύρω.
- Αλείψτε την επιφάνεια με ελαιόλαδο.
- Κόψτε σε τετράγωνα κομμάτια.
- Τέλος ψεκάστε με λίγο νερό και βάλτε στο φούρνο.
- Ψήστε σε προθερμασμένο φούρνο στο 175° C στο χαμηλότερο μέρος του φούρνου σας για 50 έως 60 λεπτά ή μέχρι τα δύο φύλλα να πάρουν ένα χρυσαφί χρώμα.
It was featured in


